The Nebula Pad has no built-in screenshot function. This guide installs a Klipper macro that captures the screen as a PNG file, accessible directly from your web interface (Fluidd or Mainsail). Two options: automatic install via SSH in one command, or manual install for those who want to understand every line.

Table of Contents

⚠️ Disclaimer

The modifications described in this tutorial involve editing Klipper configuration files and adding a plugin to the Nebula Pad.

By following this tutorial, you acknowledge that:

  • You perform all modifications at your own risk
  • The author accepts no responsibility for any damage, data loss, or malfunction resulting from the application of this guide
  • This tutorial is provided as-is, without any warranty of any kind
  • These modifications may void your warranty
  • A misconfiguration in printer.cfg or an incompatible plugin can cause Klipper to crash and prevent your printer from starting — always verify your configuration after any change
  • This guide was tested on the Creality Ender 5 Max — results may vary on other printers
The author cannot be held liable for any direct, indirect, incidental or consequential damages arising from the use or misuse of the information provided in this tutorial.

Why Do This?

The Nebula Pad has no native screenshot function — there are no physical buttons, and the standard Android screenshot commands (screencap, ADB) are not available on this device.

This tutorial installs a Klipper macro called SCREENSHOT that:

  1. Reads the raw framebuffer (/dev/fb0) — the direct video memory of the Nebula Pad screen
  2. Converts it to a properly oriented PNG file using ffmpeg
  3. Saves it to the gcodes/ folder, making it instantly accessible from your web interface (Fluidd or Mainsail)
ffmpeg is already pre-installed on the Nebula Pad by Creality — no additional installation is required for it.

What gets installed:

  • gcode_shell_command.py — a Klipper plugin that allows macros to run Linux shell commands. Without this, Klipper macros cannot execute system commands like ffmpeg.
  • screenshot.cfg — a Klipper configuration file containing the SCREENSHOT macro and its shell command
  • An include line in printer.cfg — tells Klipper to load screenshot.cfg at startup

Common Prerequisites

Both options require:

  • Root access enabled on the Nebula Pad (see our Root Access guide)
  • A PC connected to the same Wi-Fi network as the printer
  • The IP address of your Nebula Pad (Settings → Network on the pad)

Option A — Automatic Install via SSH

Choose this option if you want a fast, one-command installation with no manual steps.

Additional Prerequisites

  • PowerShell (Windows) or Terminal (macOS/Linux)

Step 1 — Connect via SSH

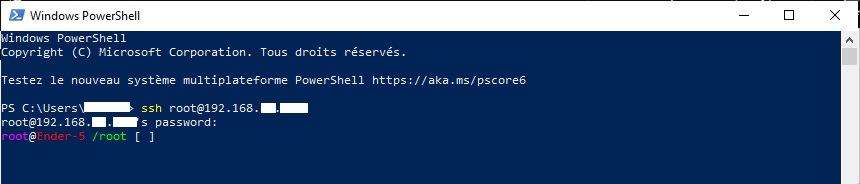
On Windows: Click Start, type PowerShell, and open it. On macOS/Linux: Open Terminal. Type the following command and press Enter:
ssh root@192.168.1.XXX
Replace 192.168.1.XXX with your Nebula Pad’s IP address.
⚠️ When prompted for the password, no characters will appear on screen — this is normal Linux security behavior. Type it and press Enter.
If you see a prompt like root@Ender-5 /root [#], you are connected successfully.
PowerShell showing successful SSH connection
PowerShell showing a successful SSH connection to the Nebula Pad.

Step 2 — Run the Installer

Copy and paste the following command and press Enter:
wget -O /tmp/install.sh https://e5mdocumentation.kinsta.cloud/wp-content/uploads/e5mdoc_ck_nebula_screenshot_install.sh && sh /tmp/install.sh
The installer will automatically:
  1. Check if gcode_shell_command.py is already installed — download it from the Guilouz repository if not
  2. Create screenshot.cfg in /usr/data/printer_data/config/
  3. Insert the include line at the very top of printer.cfg
  4. Restart Klipper then reboot the Nebula Pad
PowerShell showing full installer output
PowerShell showing the full installer output — all four steps completing successfully.
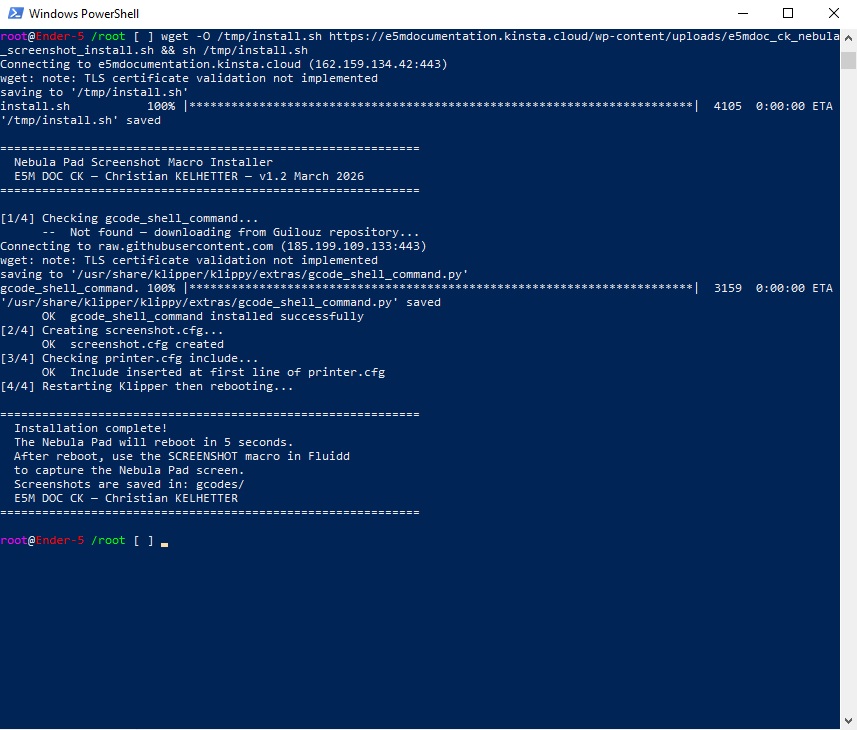
⚠️ The Nebula Pad will reboot automatically at the end of the installation. Wait for it to come back online before proceeding to the After Installation section.

Option B — Manual Install

Choose this option if you want to understand exactly what is being installed and keep full control over every file added to your configuration. Each component is installed and explained separately.

📸 Screenshots show Fluidd — Mainsail interface is similar.

Additional Prerequisites

  • PowerShell (Windows) or Terminal (macOS/Linux)
  • Your web interface (Fluidd or Mainsail) installed and accessible:
    • Fluidd: http://192.168.1.XXX:4408
    • Mainsail: http://192.168.1.XXX:4409

Step 1 — Install gcode_shell_command via SSH

gcode_shell_command.py is a Klipper plugin that allows macros to execute Linux shell commands. Without it, the SCREENSHOT macro cannot run ffmpeg.

⚠️ This step must be done via SSH. Your web interface terminal only accepts G-code commands — it cannot run Linux shell commands like wget.
  1. Open PowerShell (Windows) or Terminal (macOS/Linux) and connect to the Nebula Pad:
ssh root@192.168.1.XXX
  1. Run the following command to download and install gcode_shell_command.py:
wget -O /usr/share/klipper/klippy/extras/gcode_shell_command.py https://raw.githubusercontent.com/Guilouz/Creality-Helper-Script/main/files/gcode-shell-command/gcode_shell_command.py

This places gcode_shell_command.py directly in Klipper’s extras/ folder. Klipper automatically loads every .py file in this folder at startup — no further configuration is needed to activate the plugin.

Step 2 — Create screenshot.cfg via your Web Interface

  1. In your web interface, click the Configuration icon {...} in the left menu
  2. Click “+ New file” and name it screenshot.cfg
  3. Paste the following content:
# ============================================================
# screenshot.cfg
# Captures the Nebula Pad screen as a properly oriented PNG
# Screenshots are saved in gcodes/ folder, accessible via
# your web interface (Fluidd or Mainsail)
# E5M DOC CK — Christian KELHETTER — v1.2 March 2026
# ============================================================

[gcode_shell_command screenshot]
command: sh -c "cat /dev/fb0 > /tmp/fb.raw && ffmpeg -y -vcodec rawvideo -f rawvideo -pix_fmt bgra -s 480x272 -i /tmp/fb.raw -vf 'transpose=1' /usr/data/printer_data/gcodes/screenshot_$(date +%Y%m%d_%H%M%S).png && rm /tmp/fb.raw"
timeout: 15
verbose: True

[gcode_macro SCREENSHOT]
description: Capture Nebula Pad screen to gcodes/
gcode:
    RESPOND TYPE=command MSG="// Taking screenshot..."
    RUN_SHELL_COMMAND CMD=screenshot
    RESPOND TYPE=command MSG="// Screenshot saved to gcodes/"
  1. Click Save

Line by line explanation:

[gcode_shell_command screenshot] — declares a named shell command called screenshot that Klipper can trigger from a macro

command: sh -c "..." — the shell command that runs when triggered:

  • cat /dev/fb0 > /tmp/fb.raw — reads the raw video memory of the Nebula Pad screen and saves it as a temporary raw binary file
  • ffmpeg -y -vcodec rawvideo -f rawvideo -pix_fmt bgra -s 480x272 — tells ffmpeg the input is raw video, in BGRA color format (Blue Green Red Alpha), at 480×272 pixels — the native screen resolution of the Nebula Pad
  • -i /tmp/fb.raw — specifies the raw file as ffmpeg input
  • -vf 'transpose=1' — applies a video filter to rotate the image 90 degrees clockwise, correcting the screen orientation
  • screenshot_$(date +%Y%m%d_%H%M%S).png — saves the output as a timestamped PNG file so screenshots never overwrite each other
  • && rm /tmp/fb.raw — deletes the temporary raw file after conversion to keep the system clean

timeout: 15 — if the command takes more than 15 seconds, Klipper will abort it and log an error

verbose: True — Klipper will print the full shell command output to the console, useful for debugging if something goes wrong

[gcode_macro SCREENSHOT] — declares the Klipper macro that appears as a button in your web interface

RESPOND TYPE=command MSG="..." — sends a visible message to the console to indicate progress

RUN_SHELL_COMMAND CMD=screenshot — triggers the shell command defined above

Step 3 — Add the Include to printer.cfg

  1. In your web interface, open printer.cfg
  2. Add the following line at the very top of the file, before any other content:
[include screenshot.cfg] # E5M DOC CK - Nebula Pad Screenshot macro
  1. Click Save & Restart

Why at the top? Placing the include at the first line ensures it is always loaded first, regardless of what else is in printer.cfg. It also makes it easy to find and remove if needed.

After Installation — Take and Download a Screenshot

Once installation is complete and the Nebula Pad has restarted, the SCREENSHOT macro is ready to use.

Take a Screenshot

  1. Navigate to the screen you want to capture on the Nebula Pad
  2. In your web interface (Fluidd or Mainsail), find the SCREENSHOT button in the macros panel
Fluidd macros panel with SCREENSHOT button
Fluidd — macros panel showing the SCREENSHOT button.
  1. Click it — you will see the following messages in the console:
// Taking screenshot...
// Screenshot saved to gcodes/

Download the Screenshot

  1. In your web interface, click the Files icon in the left menu
  2. The screenshot appears as a PNG file named screenshot_YYYYMMDD_HHMMSS.png
Fluidd files panel showing PNG file
Fluidd — files panel showing the generated PNG screenshot file.
  1. Click on the file and select Download
Here is an example of what a screenshot looks like:
Example PNG screenshot of the Nebula Pad screen
Example screenshot captured from the Nebula Pad screen.

How to Uninstall

To remove everything installed by this tutorial:

  1. In your web interface, open printer.cfg and delete the line:
[include screenshot.cfg] # E5M DOC CK - Nebula Pad Screenshot macro
  1. Click Save & Restart
  2. In your web interface, delete the file screenshot.cfg from the configuration panel
  3. Via SSH, remove gcode_shell_command.py if you no longer need it:
rm /usr/share/klipper/klippy/extras/gcode_shell_command.py
  1. Reboot the Nebula Pad:
reboot
⚠️ Only remove gcode_shell_command.py if no other macros or plugins on your system depend on it.

Compatible Printers

This tutorial was written and tested on the Creality Ender 5 Max.

The macro may work on other printers using the Nebula Pad with a 480×272 screen resolution, but this has not been verified. If your screen resolution is different, the -s 480x272 parameter in the ffmpeg command will need to be adjusted accordingly.


Tutorial by Christian KELHETTER — feel free to share and adapt with credit.
v1.0 — March 2026